Connect an assistant
Point your assistant at one address and approve it in the browser. Per-client setup for Claude Code, Codex and Cursor.
Everything starts from one address:
https://tessolo.com/api/mcpMost assistants need nothing else. You paste that address, the assistant opens your browser, you see exactly what it's asking for, and you approve. No keys to copy around.
What the approval screen shows you
Read it before you click. It tells you two things that matter:
- Where you'll be sent back to. That address is the one thing an app can't fake — the name it calls itself is just text it chose. If the app claims to be one thing and the address belongs to somewhere else, stop.
- What it's asking to do. Reading your sites, changing page drafts and editing collection entries are ticked by default — all three only change drafts. Publishing and deleting are not — tick them only if you want the assistant to do those on its own.
Anyone can build an app and ask for access, so if you don't recognise what's asking, don't approve it.
Claude Code
One line:
claude mcp add --transport http tessolo https://tessolo.com/api/mcpThen run /mcp inside Claude Code. It'll walk you through the browser approval, and after
that the connection shows as connected. Ask it what can you do on my site? to check.
If you'd rather use a key than the browser approval, add it to the same line:
claude mcp add --transport http tessolo https://tessolo.com/api/mcp --header "Authorization: Bearer YOUR_KEY"Codex
Add this to ~/.codex/config.toml:
[mcp_servers.tessolo]
url = "https://tessolo.com/api/mcp"
auth = "oauth"
Start Codex and it will prompt you to approve in the browser the first time it needs access.
Cursor
Add this to .cursor/mcp.json in your project (or the global one):
{
	"mcpServers": {
		"tessolo": { "url": "https://tessolo.com/api/mcp" }
	}
}
Claude on the web and the desktop app
Add it as a custom connector and paste the same address. The approval works the same way.
Using a key instead
Some setups can't open a browser — a script, a scheduled job, a build server. For those, create a key in Workspace settings → Agent access.
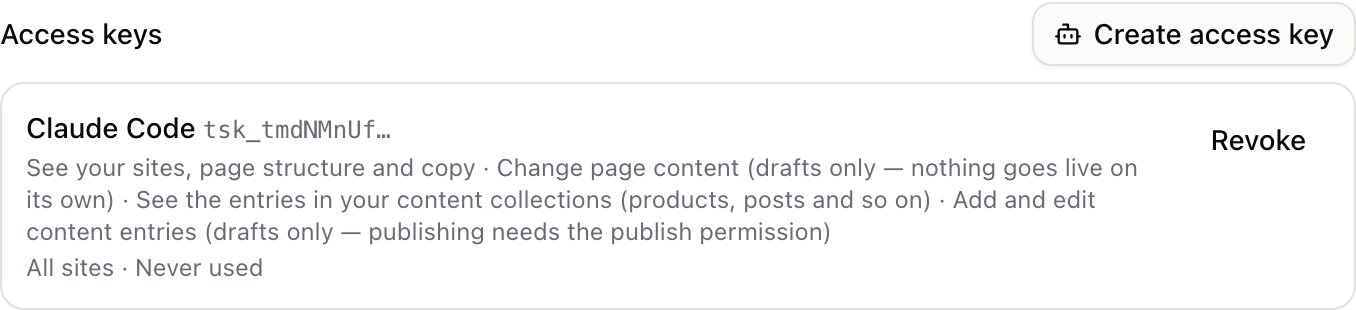
You choose what the key may do and which sites it may touch, and the key is shown once. The same screen then gives you a ready-made snippet for each assistant, with the key already in it.
A key carries the permissions of whoever created it. If that person leaves the workspace or their role is reduced, the key follows along immediately. Revoking a key cuts off any assistant using it the moment you click.
When it doesn't connect
It says the plan doesn't include this. Agent access starts at Starter. Check which plan the workspace is on under Workspace settings → Billing.
It connects but says it can't find any sites. The key was limited to specific sites, or the workspace is empty. Create a key that covers the whole workspace, or just ask the assistant to create a site.
It says it isn't allowed to publish. Publishing is off unless you turned it on. Either publish yourself in the console, or create a new key with publishing ticked — an existing key's permissions can't be widened after the fact. The same applies to putting a collection entry live: editing entries and publishing them are two separate permissions.
It reads the site but says it can't see your collections. Reading collections is its own permission. Create a new key with it ticked, or approve again in the browser.
It says the key is invalid. Keys can be revoked and can expire. Check the list under Workspace settings → Agent access — if it's gone, create a new one.
Build your site by talking to an assistant
Connect Claude or Codex to Tessolo and ask it to create pages, rewrite copy and publish — using your own AI subscription.
What it can and can't do
The full list of what a connected assistant can change, what it deliberately can't touch, and why publishing and deleting are off by default.