Connecting a custom domain
Connect a domain you already own to your Tessolo site: add it, copy the DNS records to your registrar, verify, and fix a stuck domain.
Your site works on its free address from the moment you publish. Connecting your own domain
replaces that with yourbrand.com.
Custom domains need Starter and above. Tessolo never sells or holds your domain — you buy it in your own name and keep full control of it. Any registrar works.
Don't have a domain yet?
Settings → Custom domain has a search box. Type a brand name and you get available domains with Cloudflare's at-cost price — registration and renewal shown side by side, which matters more than it sounds: plenty of extensions cost a few dollars the first year and several times that to renew.
Picking one takes you to Cloudflare to buy it. The domain is registered under your own Cloudflare account, in your name. We don't mark the price up and never touch your payment.
Searching works on every plan, including the free one. Connecting a domain to a site is what needs Starter and above.
Before you start
You need to be able to edit DNS records for the domain. That's wherever you bought it (Namecheap, GoDaddy, Cloudflare, Google Domains…) or wherever its nameservers point now.
Decide which address you actually want:
www.yourbrand.com— a subdomain. Simplest, works everywhere.yourbrand.com— the root (or apex). Nicer to say, slightly fussier. See root domains below.
Pick one as your main address. You can add the other later and send it to the first.
Add the domain in Tessolo
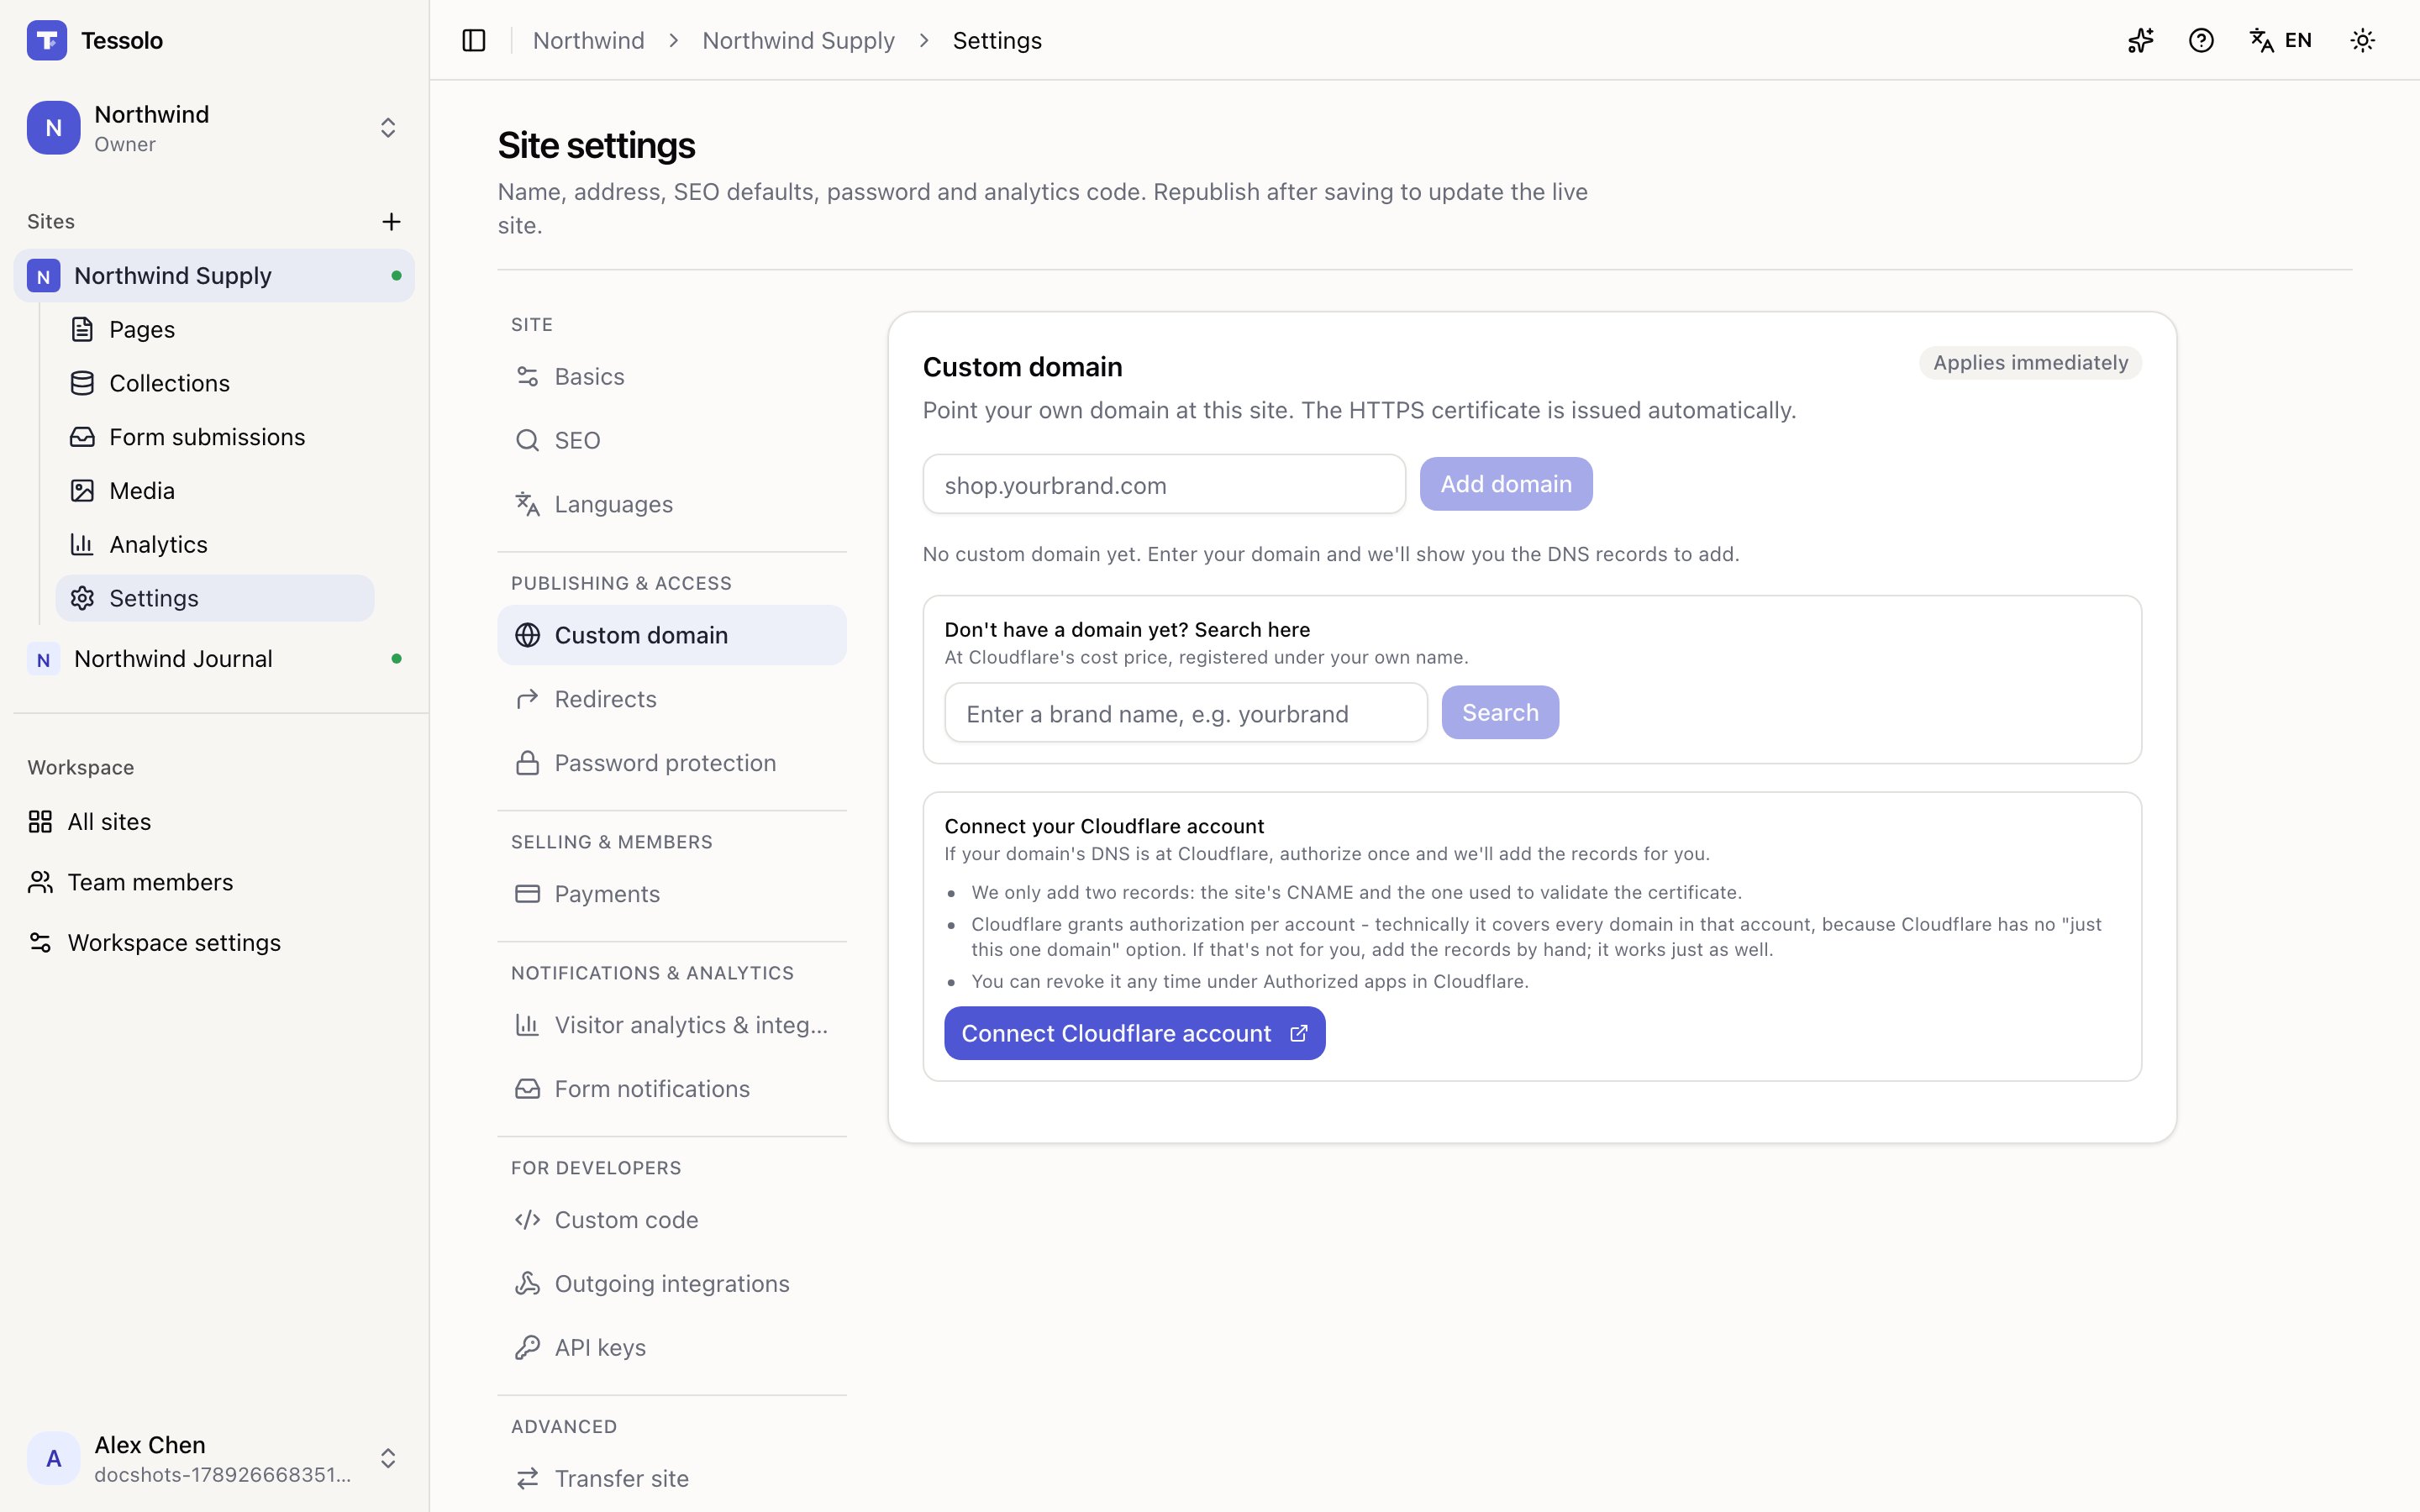
Go to Settings → Custom domain for the site and type the domain exactly as
you want it to appear — with www. if that's what you want, without if not. No https://,
no trailing slash.
Copy the DNS records
Tessolo shows a small table: Name, Type, Value. Those exact values are what your registrar needs. Copy them rather than retyping.
The section is marked Applies immediately — the domain is registered on our side as soon as you add it. The waiting is entirely on DNS.
Add them at your registrar
In your registrar's DNS panel, create a record for each row.
Tessolo looks up where your domain's DNS actually lives and names it — "we found your DNS at Aliyun" — with a link straight to that panel. If we can't recognise it we say so rather than guess.
Copy both records puts them into one plain-text message you can send to whoever manages your domain, which is often not you.
Two things people get wrong here:
- The Name field is just the subdomain part. For
www.yourbrand.commost registrars wantwww, not the whole address. Some want@for the root. - Don't create a second record with the same name. If there's already an
AorCNAMErecord for that name pointing somewhere else, edit it rather than adding another.
Wait for verification
Come back to Settings → Custom domain. The status moves through:
| Status | What's happening |
|---|---|
| Waiting for DNS | Your record hasn't propagated yet, or doesn't match. |
| Verifying | We can see it and are issuing an HTTPS certificate. |
| Active | Done. The domain serves your site over HTTPS. |
| Failed | Something's wrong — see when it stays stuck. |
Usually a few minutes. Registrars advertise "up to 48 hours"; that's a worst case you'll rarely hit.
You don't have to sit on the page: while a domain is pending, Tessolo re-checks every 20 seconds on its own and emails you once it goes live. Check again forces a check immediately. If it's still stuck after half an hour, the page lists the causes worth checking first.
You don't do anything for HTTPS. The certificate is issued automatically once DNS is verified, and renews on its own from then on.
Set the primary domain
With more than one domain on a site, mark one as primary. That's the address used in links, in your sitemap, and in the canonical tag search engines read.
Without a primary, search engines can index the same page under two addresses and split its ranking between them.
If your DNS is at Cloudflare
When your domain's DNS is hosted at Cloudflare, you can skip the copying entirely: connect your Cloudflare account once and Tessolo adds the records for you.
Cloudflare grants authorization per account — technically it covers every domain in that account, because Cloudflare offers no "just this one domain" option. We only ever write the two records for the domain you're connecting, and you can revoke us at any time under Authorized apps in Cloudflare. If that's not for you, adding the records by hand works exactly as well.
It runs in two steps, deliberately:
- Start setup. We add only the certificate validation record. Your live site is not touched — visitors still reach whatever it points at today.
- Switch traffic. Available once the certificate is issued. This is the step that changes what visitors see, and it takes effect within a minute or two.
If the switch has to replace an existing record — most often an A record pointing at your
current server — we save a full copy of it first and show you exactly what will be replaced.
Unbinding the domain later puts that record back.
Some situations we won't touch, and say why instead of greying out a button: the domain is still pending in Cloudflare (its nameservers haven't moved yet), it's in partial/CNAME-setup mode, it's a read-only secondary zone, or the certificate validation slot is already taken by another service — overwriting that would break their renewals.
Root domains
yourbrand.com with no subdomain is a special case, because the DNS standard doesn't allow
a CNAME record at the root of a domain.
Most registrars work around this with a feature called CNAME flattening (Cloudflare), ALIAS (DNSimple, Namecheap), or ANAME (easyDNS). If yours has one, use it with the value Tessolo gives you and it behaves like a normal CNAME.
If yours has none of those, the practical answer is to make www.yourbrand.com your main
address and use your registrar's domain forwarding to send the root to it. Nearly every
registrar offers forwarding even when it doesn't offer ALIAS records.
When it stays stuck
Still 'Waiting for DNS' after an hour
Check the record actually exists and matches. Open a DNS checker such as whatsmydns.net and look up your domain.
If it finds nothing, the record isn't live yet — or was saved under a slightly different
name. Look for a stray trailing dot, or the whole address typed into a Name field that only
wanted www.
If it finds something that isn't the value Tessolo gave you, there's an older record for the same name getting in the way. Delete it.
'Failed'
Almost always a conflicting record: two records for the same name, or an existing A record
left over from a previous host sitting alongside the new CNAME.
Remove the old records so only Tessolo's remain, then press Check again.
The domain loads someone else's site, or an error page
Old addresses get remembered for a while, by your browser and by the internet in between. Try a private window first. If a DNS checker shows the right value but your own browser still doesn't, you're waiting on that memory to expire — usually minutes, occasionally a few hours if the previous setup asked for a long one.
It works, but shows the old free address in links
Set the domain as primary, then republish. Links, sitemap and canonical tags are frozen into the published snapshot, so they update on the next publish — not the moment you change the setting.
Certificate warning in the browser
The certificate is issued after DNS verifies, and there's a short window where DNS points at us but the certificate isn't ready. If it persists for more than an hour with status Active, contact support with the domain name.
After it's live
Republish the site. Your published pages contain the address they were published with; a republish refreshes links, the sitemap and canonical tags to use the new domain.
The old free address keeps working, so anything already linking to it doesn't break.
Analytics keep their history across the change — the old hostname stays attached to the site, so your traffic chart doesn't reset to zero.
Your site address
The free public address every Tessolo site gets when you publish, how to change it, reserved names, the browser tab icon, and custom domains.
Redirects
Set up 301 and 302 redirects in Tessolo to keep old addresses working when a page path changes or you move over from another platform.